
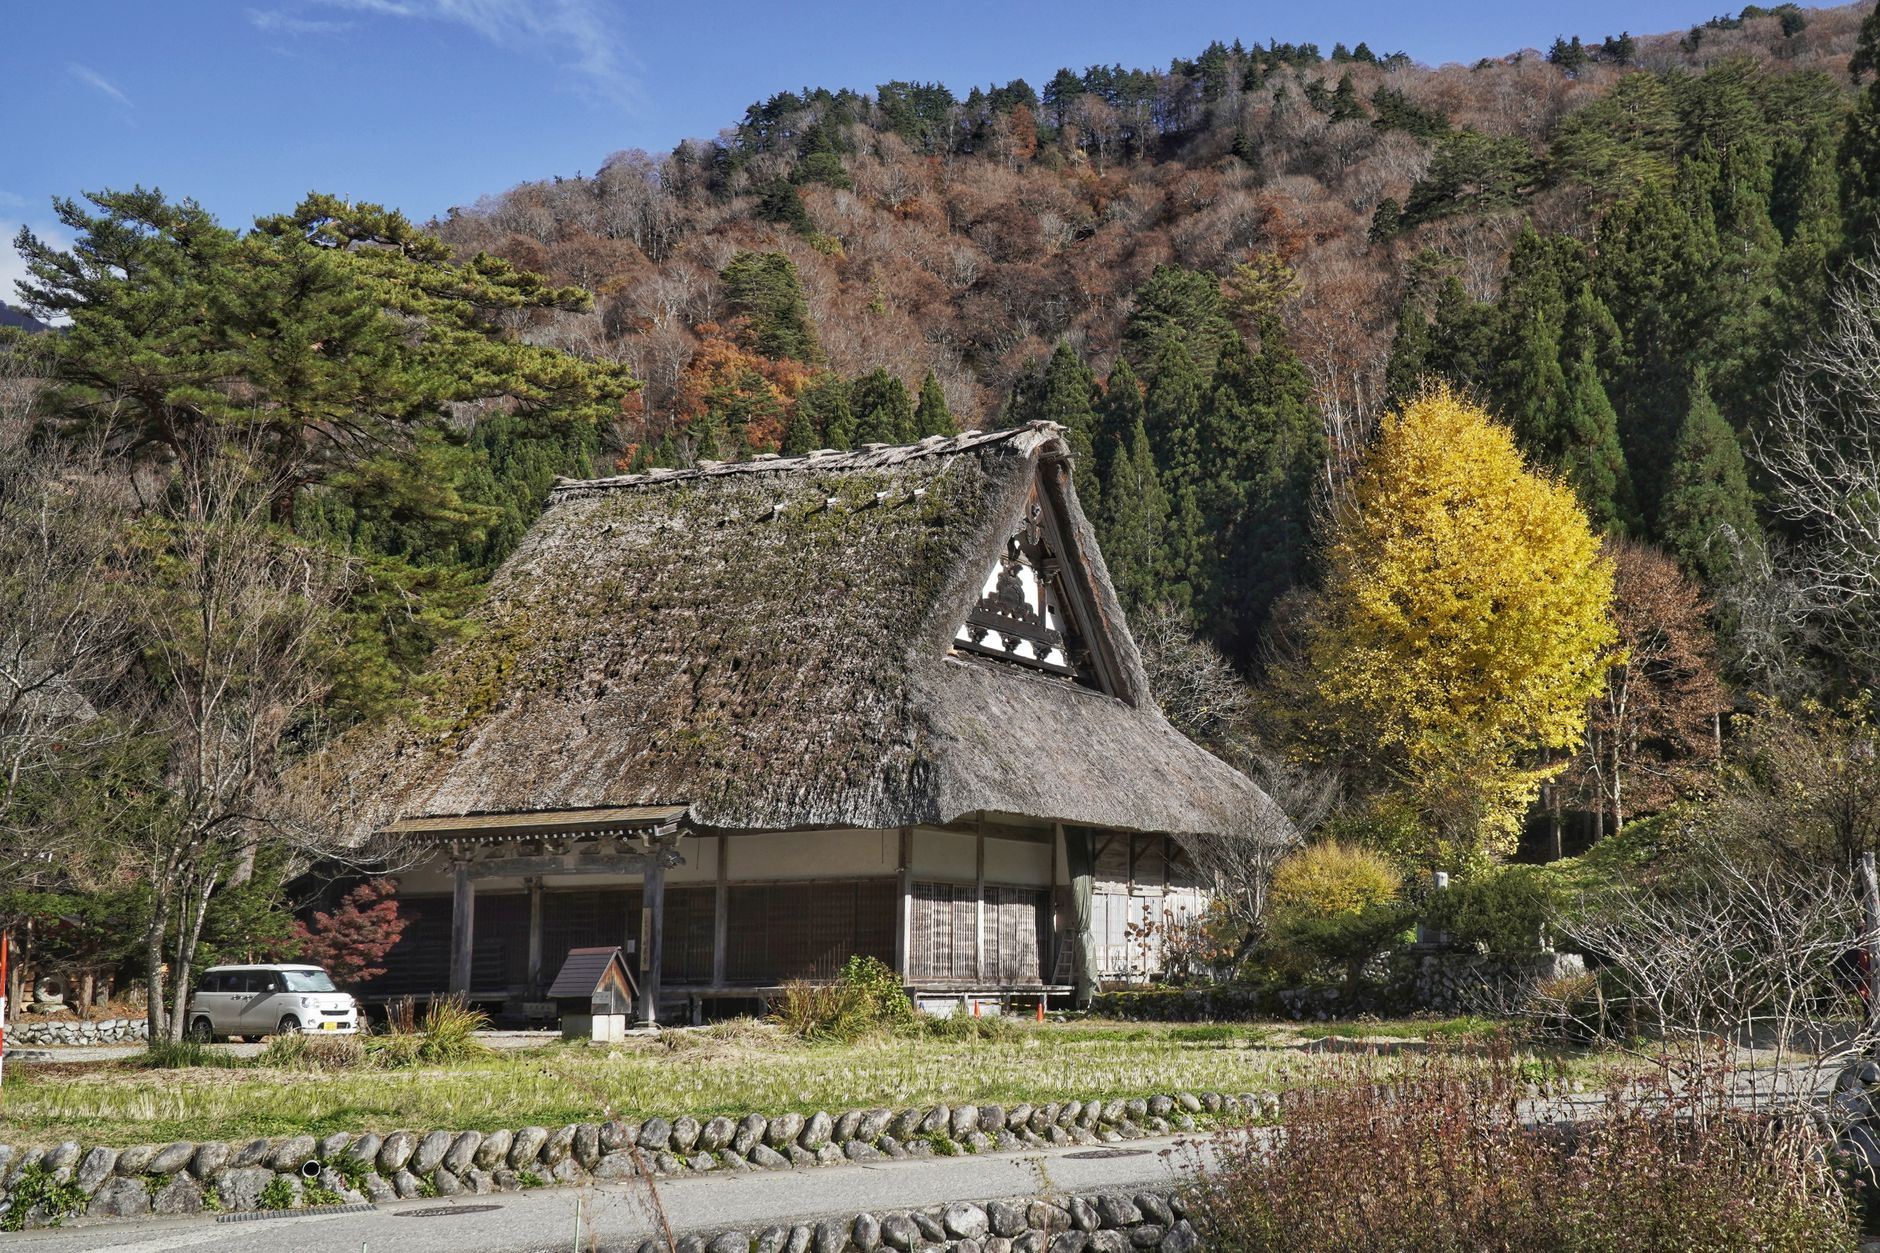
Hunting for Fall Colors in Shirakawa-go: A Map of Photo Angles and the Best Light
Shiroyama Observatory, the trio of gassho houses in Ogimachi, freshly harvested rice fields, and still ponds — with times, sun direction, and camera settings to capture autumn leaves in their true colors.
Aug 12, 2026·✍️ olablog·⏱ 17 min read
Shiroyama Observatory, the trio of gassho houses in Ogimachi, freshly harvested rice fields, and still ponds — with times, sun direction, and camera settings to capture autumn leaves in their true colors.
Tap a region to browse articles
The first time I went up to Shiroyama Observatory, it was almost 10 a.m. on a day in early November. The weather was beautiful, the mountainside was blazing with red and gold leaves, and… three rows of people were holding up their phones in front of me. I managed to take exactly one photo with half of someone’s head in the lower-right corner. Looking at it later, the photo wasn’t bad, but it looked exactly like the thousands already online — only blurrier.
The following year, I stayed overnight in the village, got up while it was still dark, and hiked up to the observatory just before 6 a.m. There were exactly four people up there. Mist rose from the Shogawa River and drifted across the thatched roofs, the first sunlight touched the mountain behind them, and in that fifteen-minute window I took photos I still use as cover images today. The difference wasn’t the camera — I was still using the same old body and the same old kit lens. It was where I stood and when I got there.
This article is a map of those spots. It’s not a list of “10 check-in points,” but a practical one-day shooting route: where to stand, which direction to face, when the light is right, and where to place your camera so the autumn leaves come out in their true colors instead of blowing out into a flat orange mass. Gokayama is included at the end — a place I think many people unfairly miss because it offers something Shirakawa-go now struggles to provide: quiet.
When does autumn arrive here?
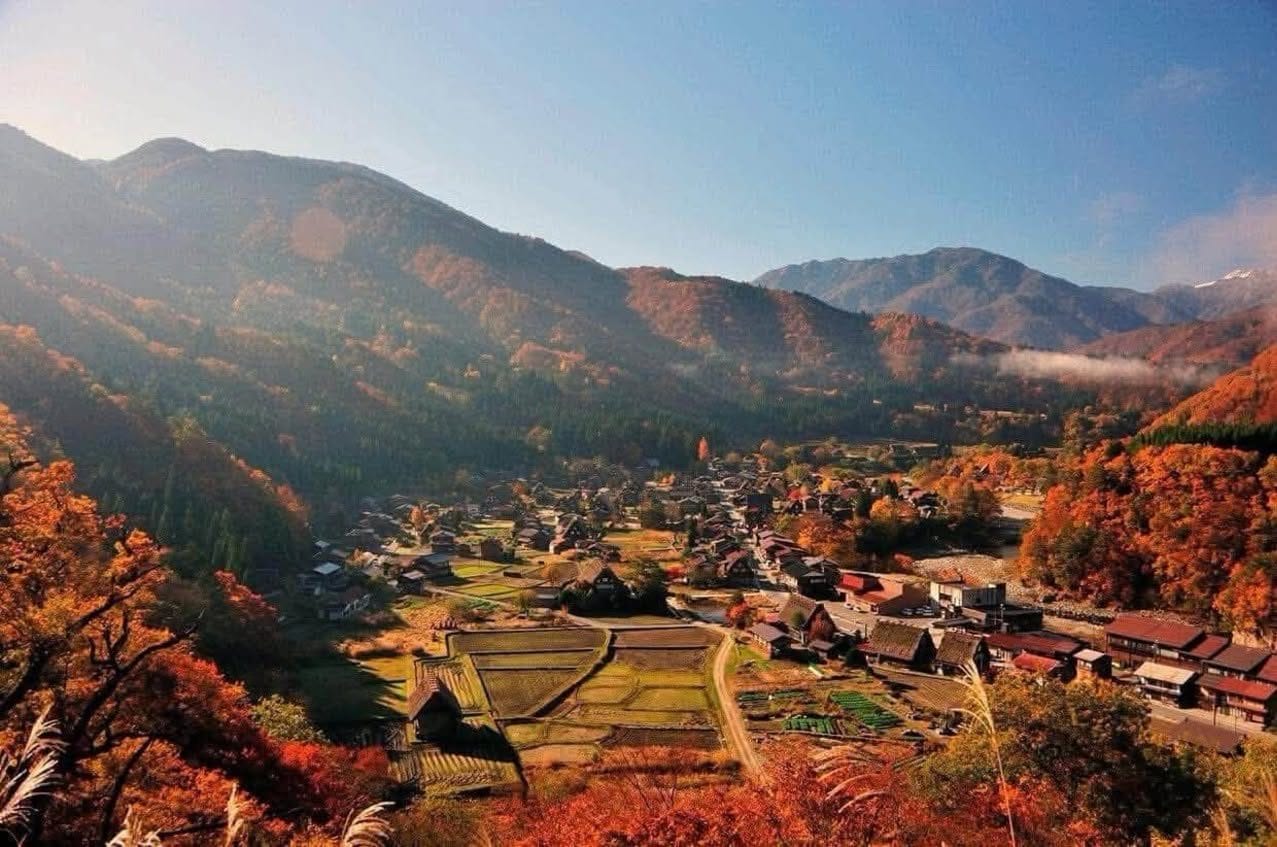
Ogimachi Village sits at an elevation of around 500 meters in the Shogawa River valley, Gifu Prefecture. The mountaintops around the village begin changing color around mid-to-late October, and the colors gradually “flow” down toward the valley floor. Peak color at village level — meaning when the trees around the gassho houses and along the roads have turned red — usually arrives from early to mid-November, though it can shift by several days to a week depending on summer weather and the first cold spells of the season.
Don’t book your tickets based on one fixed date. About two weeks before your trip, check Japan’s autumn foliage forecasts and the village’s official website to finalize your plans. If your schedule is fixed, early November is the safest choice: even if the timing is slightly off, you’ll still have colorful mountains in the background.
One detail that few people consider: autumn here has two distinct layers. The first runs from late September to mid-October — ripe and freshly harvested rice, glowing golden fields, and in some places, frames set up for drying rice. The second is November — red leaves and fields reduced to golden-brown stubble. These two periods produce very different kinds of photos. If you love golden rice fields embracing thatched roofs, go earlier than most people expect.
Photo location map: follow this order
1. Shiroyama Observatory — the classic view, and how to make it different
This is the photo everyone knows: the entire village stretching through the valley, layers of thatched roofs, and mountains all around. The observatory stands on the site of the old Ogimachi Castle on the eastern hillside, facing slightly west — which means that in the morning, sunlight comes from behind you and falls onto the village, creating even, front-lit conditions that bring out every layer of the thatched roofs.
There are two ways up. Walking from the village takes around 15–20 minutes on a clearly marked uphill path, and sneakers are sufficient. Alternatively, a small shuttle bus runs during the daytime from the area near Wada House to Shiroyama Tenshukaku Observatory, where there is a restaurant and a separate viewing area, for a small fee — schedules and prices vary by season, so check the notices on-site or the official website.
Tips for making your photos look different from everyone else’s:
- Don’t only shoot wide. Everyone sets their lens to 24mm and tries to fit in the entire valley, leaving the village tiny in the middle of the frame. Try 70–135mm (full-frame equivalent) to compress a cluster of 5–6 houses against the red mountainside. The image will feel much denser.
- Shoot vertically. A vertical frame captures the fields in the foreground, the village in the middle, and the mountains and clouds above. It’s easy to post and surprisingly few people do it.
- Use the maple tree at the edge of the observatory as a soft foreground element in the upper corner. Open the aperture moderately (f/5.6–f/8), focus on the village, and let the maple leaves fall slightly out of focus to create another layer.
- The real golden hour here is 15–30 minutes before and after sunrise, not just “early morning” in general. Arrive about 30 minutes before sunrise to choose your spot, because the safety railing is fairly low and there are only enough good standing positions for a few people.
2. The cluster of three gassho houses north of Ogimachi
In the northern half of the village, there is a group of gassho houses standing close together, almost in a straight line, with fields in front. They are the most manageable subjects in the entire village: large enough to tell a story, but compact enough to avoid visual clutter.
My favorite way to photograph them is to lower the camera close to field level, use around 50–85mm, and arrange the three thatched roofs in a diagonal rhythm across the frame. In the early morning, when a thin layer of mist still lingers, the mist separates the three roofs from one another — that’s when the photos have the most depth. If you arrive in the late afternoon, move slightly toward the west to catch the angled light hitting the edges of the roofs; the individual strands of thatch will stand out clearly.
Important note: people actually live in these houses. The surrounding fields are villagers’ farmland. Photograph from public roads, don’t step onto the field embankments, don’t point your lens at windows, and keep your voice down if you arrive early.
3. Harvested fields and rows of rice stubble
Most visitors walk past the fields without looking down. After harvest, the fields in Ogimachi are left with perfectly even rows of rice stubble. When the low morning or afternoon sun sweeps across them, those rows become natural leading lines running straight toward the gassho houses.
To make use of them, stand at the end of a field so the rows of stubble run diagonally from the lower corner of the frame toward your subject. Use a slightly wide angle (28–35mm) and lower the camera so the stubble fills roughly the lower third of the frame. If rain has left pools of water in the field, you get a bonus: each small puddle reflects the sky and rooftops, creating a beautiful speckled effect.
From around late September – early October, some fields in the area still have frames set up for drying rice. If you see one, don’t pass it by: wooden racks stacked with golden rice in front of thatched roofs are quintessentially Japanese rural imagery, and they disappear after just a week or two.
4. Ponds and reflections
There is a small pond in the middle of the residential area (locally called Nigori-ike), along with several scattered irrigation channels and ponds. This is where you can capture a “mirror” image — a gassho roof reflected upside down on the water, framed by red leaves.
You need three conditions: still water, soft light, and a camera positioned very low. Wind is the enemy, so the best times are early morning before the valley begins to “breathe,” or late afternoon when the breeze dies down again. Place the camera almost at water level — use a flip-out screen or hold your phone low, rather than standing upright and shooting downward, which makes the reflection disappear.
A circular polarizing filter (CPL) is a double-edged sword here. Turn it one way and it removes reflections to reveal the bottom; turn it the other way and it preserves reflections while deepening the red leaves. If you want a mirror image, don’t turn it all the way — make small adjustments until you retain the reflection while reducing glare on the leaves.
5. Deai Bridge and the Shogawa Riverbank
The suspension bridge across the Shogawa River, connecting the parking area with the village, is a place countless people cross but few stop to photograph properly. Standing in the middle of the bridge and pointing your lens along the river gives you clear blue water, rounded stones, and changing forests on both banks. The bridge vibrates slightly when crowded, so if you want a slow shutter speed for smooth water, go down to the riverbank instead of shooting from the bridge.
This is also a good place to shoot around midday — when harsh light ruins the village scenery, the valley is filled with shade, and the leaf colors come out beautifully.
6. Wada House, Myozenji, and the narrow lanes
When the sun climbs high and the wide views lose their appeal, switch to details. Wada House is one of the largest and oldest gassho houses in the village, and it is open to visitors (check the hours and admission fee on-site). Inside, smoke from the irori hearth filtering through the window light creates beautiful rays — raise the ISO a little, meter for the bright areas, and accept deep shadows.
The grounds of Myozenji Temple, with its gassho-style thatched roof and surrounding trees, produce the most vivid autumn colors in the village at peak season. The narrow lanes between the rows of houses offer smaller details: stacked firewood, persimmons hanging to dry, thatched roofs wet with dew, and a bicycle leaning against a wooden wall. Your photo series needs these images so it doesn’t become nothing but wide establishing shots.
7. Gokayama: Ainokura and Suganuma for those seeking quiet
Around 20–40 minutes by car north of Shirakawa-go, across the border in Toyama Prefecture, are two smaller gassho settlements belonging to Gokayama: Suganuma (with only around a dozen houses, right beside the river) and Ainokura (larger and situated on a raised terrace). Both are part of the same World Heritage site as Ogimachi, but are many times quieter.
Ainokura has a short walking trail leading to a viewpoint behind the settlement — after about ten minutes of climbing, you get a full view of the small village surrounded by changing forest, the kind of fairytale scene that is now difficult to photograph without people in Ogimachi. Suganuma is better suited to low-angle compositions: houses, fields, river, and mountains compressed into a horizontal frame.
If you have two days, I suggest dividing your time like this: spend the late afternoon and the following early morning in Ogimachi (stay in the village or in Takayama), then head to Gokayama in the latter half of the second morning, when Ogimachi starts getting crowded. Intercity buses between Takayama – Shirakawa-go – Kanazawa stop at Gokayama on some services, but departures are infrequent and many routes require advance reservations, so check the bus operator’s schedule before setting out.
Light schedule: a practical day of shooting
Before sunrise (around 40–20 minutes before sunrise). The sky turns deep blue, the lights inside the houses are still warm yellow, and if the previous night was clear, still, and humid, mist will rise from the river. This is the most beautiful and quietest time for photography. Bring a tripod.
From the first sunlight until around 8 a.m. The sun touches the mountain behind the village first, then reaches down to the valley floor. The moment when “the mountain is lit while the village is still in shadow” lasts only a few minutes and is well worth waiting for. After that comes warm, even light — perfect for the panoramic view from Shiroyama.
9–15 hours. The light is harsh, contrast is high, the thatched roofs look flat and washed out, and the observatory is at its busiest. Don’t force wide shots at this time. Switch to indoor scenes, details, shaded spots along the river, or a trip to Gokayama.
About an hour and a half before sunset. The sun comes in from the west, which means the light is slightly backlit when you look out from Shiroyama. That’s actually good for the leaves: when maple leaves are backlit, they become translucent like stained glass. Meter for the leaves, add a little exposure compensation, and hide the sun behind a branch to avoid flare.
Blue hour after sunset. Around 20–30 minutes after sunset, the sky is still a deep blue and the village lights are on. This is the best time for beautiful pond reflections because the wind has died down. Use a tripod and expose for 1–4 seconds.
Note: autumn gets dark very quickly, and temperatures in the valley drop sharply after sunset. Bring a warm jacket and a small flashlight, and if you aren’t staying overnight in the village, plan carefully around the time of the last bus — many services end earlier than you might expect.
Camera settings for autumn foliage
The basics
- Shoot RAW. Red and orange are the colors most likely to “break up” when JPEG files are compressed. RAW gives you more room to recover detail.
- Use the lowest ISO possible when you have a tripod (ISO 100–200). Wide scenes in the morning often require 1/15–1/60 second, which is manageable handheld if you have image stabilization, but a tripod is still better.
- Use f/8 for wide scenes. It’s the sweet spot for most lenses. Don’t stop down beyond f/16, as diffraction will start reducing sharpness.
- Set exposure compensation to −0.3 to −0.7 EV when photographing red leaves in sunlight. The red channel clips before the others, something the combined histogram may not reveal — leaving you with a mass of leaves stripped of detail, flat as colored paper. If your camera displays separate RGB histograms, turn them on and watch the red channel.
White balance and color
Auto WB often “corrects away” some of the warmth and makes red leaves look washed out. Set it manually around 6000–7000K (roughly equivalent to the Cloudy or Shade preset) to preserve the warm tones of morning and afternoon. If you’re shooting in shade and want more accurate leaf colors, bring it down to around 5500K.
As for color profiles, if your camera has modes such as Vivid or Landscape, remember that they push saturation very aggressively — attractive on the camera’s screen, but prone to turning reds into mush. I use a neutral profile when shooting RAW and process the images afterward.
Filters
A CPL is the most worthwhile accessory for autumn foliage. Maple leaves have a glossy waxy surface, and in sunlight they reflect white light that makes the colors look pale. Rotating the CPL to the right position cuts through that glare and makes the reds pop immediately, without needing to increase saturation. Keep in mind that a CPL costs around 1–2 stops of light and can make the sky unevenly polarized with wide-angle lenses — consider this carefully with lenses wider than 24mm.
You only need an ND filter if you want to smooth out the river with a daytime long exposure.
Lenses
If you can bring only two lenses, a 24–70 zoom and a 70–200 telephoto (full-frame equivalent) are the perfect combination for this area. A telephoto is more important than many people realize — it creates those compressed images of rooftops against red mountainsides, and it also helps isolate your subject from the crowds.
Shooting with a phone
It’s entirely possible; you only need three adjustments. First, turn on Pro mode or use a RAW camera app to lock the white balance and slightly reduce exposure. Second, use your phone’s telephoto lens (2x/3x/5x) instead of digital zoom, and favor vertical compositions. Third, bring a mini tripod — blue-hour shots and reflections are nearly impossible to capture handheld.
Post-processing: a light touch is enough
The biggest trap with autumn foliage is pushing the saturation until the colors look “exciting,” only to end up with an image that resembles a cartoon. A more lasting approach is to increase vibrance slightly instead of saturation, then use the HSL panel to adjust only the red/orange range — lower red luminance a little to make it deeper and more dimensional, and shift orange hue slightly toward red if the leaves look too yellow. Keep the thatched roofs in a neutral gray-brown tone; don’t let them pick up the orange cast of the foliage. That detail is what makes your photos look cleaner.
A few courtesies to remember
Ogimachi and the settlements of Gokayama are inhabited villages, not theme parks. Don’t enter yards, fields, or fenced-off areas. Do not fly drones — unauthorized flights are prohibited in this area. Tripods at the observatory can easily block people during peak hours, so fold them up when it gets crowded. Take your trash with you, and if you arrive early, keep quiet — at 6 a.m., people are still sleeping.
Private vehicles cannot enter the village; park in the lot across the river and walk over the bridge. On peak-season weekends, the parking lot is usually full before 9 a.m., and the road in can back up for a long way, so if you’re driving, arrive very early or choose a weekday.
Frequently asked questions
Should I visit Shirakawa-go as a day trip or stay overnight?
If photography is your goal, stay one night — either in the village (gassho houses operate as minshuku and need to be booked very early for peak season) or in Takayama, then take the earliest bus. The entire value of this guide lies in the hours before 8 a.m. and after 16 hours, while day tours arrive and leave right in the middle.
Can I get good photos without a professional camera?
Absolutely. Where you stand and when you shoot determine most of the quality of a landscape photo. A modern phone at the observatory during sunrise will produce a much better image than a full-frame camera standing in the same place at 11 a.m.
Does autumn have an illumination festival like winter?
Shirakawa-go’s famous illumination event takes place in winter, usually during January–February, and currently uses a limited-capacity registration/reservation system. Autumn has no equivalent event. Check the village’s official website if you plan to visit around that time.
Is it convenient to travel from Shirakawa-go to Gokayama by public transportation?
There are intercity bus routes that pass through, but departures are infrequent and some services require advance reservations. If you only have half a day and aren’t renting a car, choose Ainokura and plan your return as soon as you arrive. Schedules change by season, so check the bus operator’s website before your travel date.
Should I cancel if it rains?
Don’t. Light rain darkens the thatched roofs, deepens the foliage colors, and most importantly, rain overnight followed by clear morning skies is the perfect recipe for valley mist. Many of Shirakawa-go’s best photos are taken on mornings immediately after a rainy night.
How many days are enough?
Two days and one night is a good balance: one afternoon to get familiar with the area, one serious sunrise shoot, and one late morning in Gokayama. If you add Takayama’s old town, three days and two nights makes for a very comfortable itinerary.
More from this region — Chubu (Nagano, Kanazawa)
View all →
Connecting Shirakawa-go, Gokayama, and Kanazawa: A Three-Stop Autumn Route
18 min · tips
Six Days of Doburoku Festivals in Shirakawa-go in Mid-October
18 min · tips
Shirakawa-go in late fall: how the leaves change week by week and when to book
17 min · tips
A Fall Day in Shirakawa-go: An Hour-by-Hour Itinerary for Day-Trippers
17 min · tips