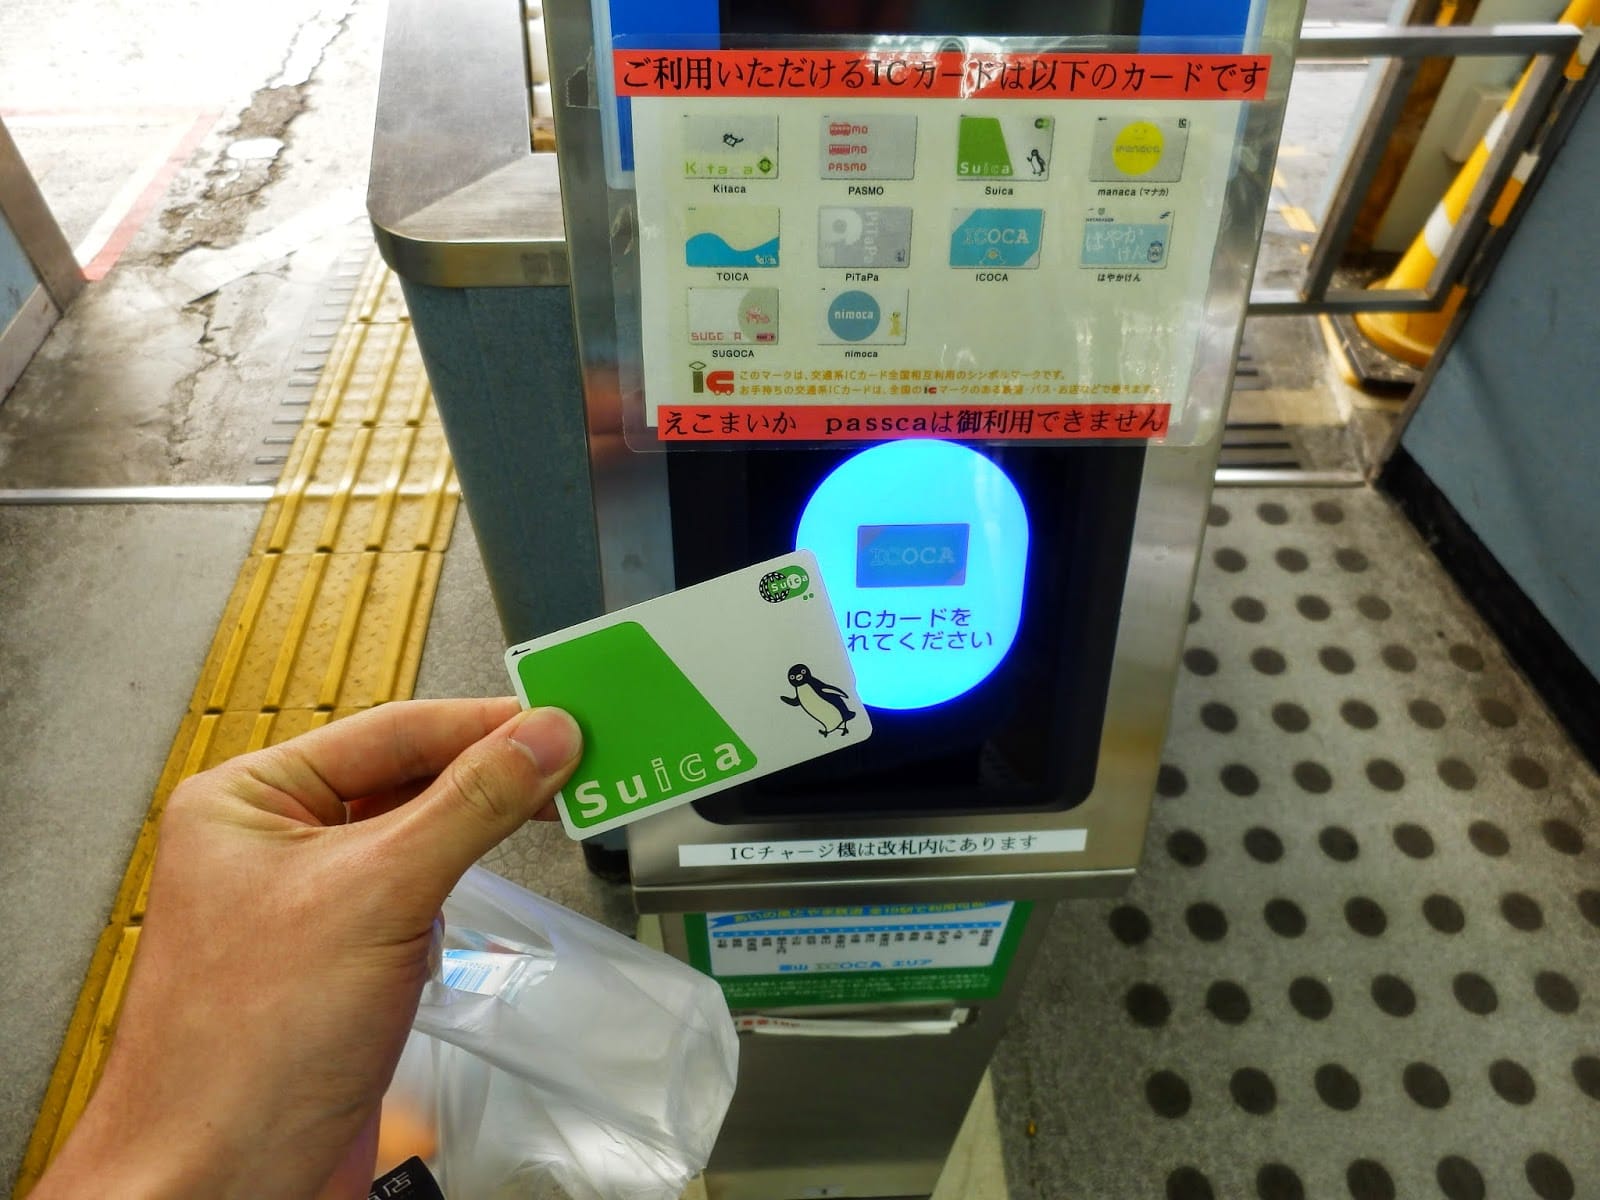
Suica, Pasmo and Welcome Suica
Jul 10, 2026 · ✍️ olablog · ⏱ 24 min read
Navigate Japan's transport and payments effortlessly with our guide to Suica, Pasmo & Welcome Suica. Essential tips for Indian & Bangladeshi travelers on mobile cards, foreign card charging, and refunds.
Japan's public transport network is renowned for its efficiency and punctuality, a marvel that can initially seem daunting to first-time visitors from India and Bangladesh. While navigating the labyrinthine stations, a simple, indispensable tool will be your best friend: the IC card. These rechargeable smart cards, primarily Suica and Pasmo, streamline your journeys across trains, subways, and buses, and even simplify payments at countless shops. Understanding how to acquire, use, and manage these cards, especially Mobile Suica and the tourist-friendly Welcome Suica, will save you significant time and hassle, transforming your travel experience.
What are IC Cards and Why Do You Need One?
Imagine a single card that lets you glide through metro gates, hop onto buses, and even pay for snacks at a convenience store. That's precisely what an IC (Integrated Circuit) card like Suica or Pasmo offers in Japan. These contactless smart cards eliminate the need to buy individual tickets for each journey, which can be a time-consuming affair, especially during peak hours in bustling hubs like Shinjuku or Shibuya. For travelers accustomed to the token or card systems of the Delhi Metro or Dhaka Metro, the concept is familiar, but the sheer breadth of acceptance in Japan is remarkable.
The primary benefit of an IC card is unparalleled convenience. Instead of fumbling for change or deciphering complex fare charts, you simply tap your card on the reader at ticket gates or on buses. The correct fare is automatically deducted, saving precious minutes that can be better spent exploring Japan's unique culture. This seamless experience is particularly valuable for visitors on a tight schedule, allowing for spontaneous changes in itinerary without the worry of purchasing new tickets. Furthermore, these cards are not just for transport; their utility extends to a vast network of vending machines, coin lockers, and a wide array of shops, making them a versatile payment solution for everyday needs.
For Indian and Bangladeshi travelers, managing foreign currency can sometimes be a minor stress point. While major credit cards are accepted in many places, having an IC card loaded with Japanese Yen (¥) simplifies smaller transactions, reducing the constant need for cash or worrying about card minimums. It acts as a digital wallet for your daily commute and small purchases, providing a sense of security and ease. Whether you’re grabbing a quick bento box, buying a drink from a vending machine, or storing your luggage, your IC card will likely be accepted, making your Japanese adventure smoother and more enjoyable.
Suica vs. Pasmo: Understanding the Core Difference
When planning your Japan trip, you'll inevitably encounter two prominent IC card names: Suica and Pasmo. Historically, Suica was introduced by JR East, the primary railway company operating in the Kanto region (including Tokyo), while Pasmo was launched by non-JR private railway and subway operators in the same area. This distinction, however, is largely historical and holds minimal practical difference for most tourists today. Both cards are now fully interoperable across virtually all major train, subway, and bus lines throughout Japan's major cities, a system affectionately known as "mutually compatible" (全国相互利用サービス).
This means that if you purchase a Suica card in Tokyo, you can use it seamlessly on the Kyoto subway, Osaka's JR lines, or Hiroshima's streetcars, and vice-versa for a Pasmo card. The decision of which one to get often boils down to where you first land or which ticket machine is most convenient at your arrival station. For instance, if you arrive at Narita Airport and plan to take a JR train, a Suica might be slightly more prominent for purchase. If you’re at Haneda and heading into central Tokyo via a private subway line, a Pasmo might be easier to spot. Functionally, for 99% of tourist activities, they are identical.
The primary operational difference that might subtly impact a tourist is the refund location. While both cards can be used nationwide, a physical Suica card can only be refunded at JR East stations, and a physical Pasmo card only at non-JR stations in the Kanto area. This is a minor point for most, especially given the rise of Mobile Suica and Welcome Suica, which have different refund or expiry policies. Therefore, rather than stressing over Suica versus Pasmo, focus on securing any IC card that suits your preferred acquisition method, knowing that its utility will be widespread across the country.
Mobile Suica & Mobile Pasmo: The Smartphone Revolution for Indian & Bangladeshi Travelers
The most convenient and arguably future-proof way to use an IC card is through your smartphone. Mobile Suica and Mobile Pasmo transform your iPhone or Android device into a digital IC card, allowing for tap-and-go payments directly from your phone. For tech-savvy travelers from India and Bangladesh, this offers immense convenience, eliminating the need to carry a separate physical card and the worry of losing it. However, compatibility and charging methods require careful attention, especially with foreign credit cards.
Mobile Suica on Indian iPhones
For iPhone users, Mobile Suica is integrated directly into Apple Wallet. iPhones purchased in India (or any region outside Japan, China mainland, and Hong Kong) generally support Mobile Suica, provided they are iPhone 8 or newer models. The process involves adding a Suica card directly within the Apple Wallet app. You can choose to create a new Suica card or transfer a physical Suica card's balance to your phone (though transferring a physical card is often more complex for tourists). Once added, you can top up your Mobile Suica using Apple Pay.
The critical hurdle for many international travelers, including those from India and Bangladesh, is that Apple Pay often requires a Japanese-issued credit card for direct top-ups within the Suica app or Apple Wallet. While some international Visa or Mastercard credit cards might work for initial small top-ups, consistency is not guaranteed. Many users report failures when trying to charge Mobile Suica with foreign cards. The most reliable method for topping up Mobile Suica with a foreign card on an Indian iPhone is to link your Mobile Suica to a foreign-issued credit card via Google Pay (yes, Google Pay, not Apple Pay) or the Suica app itself, or by visiting a convenience store (see 'Topping Up' section). This workaround involves adding your foreign card to Google Pay, which surprisingly often works better for Japanese transit apps. Another option is to use an app like Revolut or Wise, which can provide virtual Japanese debit card details, though this adds another layer of complexity.
Mobile Suica/Pasmo on Indian Androids
Android users can download the official "Suica App" or "PASMO App" from the Google Play Store (you might need a Japanese Google Play account or to sideload the APK, which can be risky and is not officially recommended). Most modern Android phones (especially those with NFC capabilities) purchased in India should technically support FeliCa emulation, which is the NFC standard used for IC cards in Japan. However, the software integration can be trickier than with iPhones.
Similar to iPhones, charging Mobile Suica or Pasmo on Android using foreign credit cards directly within the app can be problematic. While Google Pay is more globally integrated, the underlying payment gateway for these Japanese transit apps often defaults to Japanese domestic card processing. The most consistent method for Android users is to top up Mobile Suica/Pasmo with cash at convenience stores or station machines, or to leverage a Japanese-issued payment method. If you manage to get the app installed, attempt small top-ups with your Indian credit/debit cards, but be prepared for potential rejections.
Given the complexities of foreign card charging, especially for first-time visitors, consider these alternatives:
- Top up with cash: The most reliable method for both iPhone and Android Mobile Suica users. Simply go to any convenience store (7-Eleven, FamilyMart, Lawson) or a station machine and use cash.
- Consider a Welcome Suica: If mobile payments prove too difficult with your foreign card, a physical Welcome Suica might be a less stressful option, as it avoids credit card issues entirely.
The convenience of having your transit card always with you on your phone is undeniable, making it worth exploring for tech-savvy travelers. Just be aware of the potential charging hurdles with foreign credit cards and have a backup plan (cash or a physical card) ready.
Welcome Suica: The Tourist-Specific Alternative
For tourists who prefer a physical card but don't want the hassle of a deposit or the long-term commitment of a regular Suica/Pasmo, the Welcome Suica is an excellent option. Launched by JR East, it is specifically designed for short-term visitors to Japan. Unlike regular Suica or Pasmo cards, the Welcome Suica does not require a ¥500 (~₹280) refundable deposit. This is a significant advantage for tourists, as it means less upfront cost and no need to go through a refund process at the end of your trip.
However, the absence of a deposit comes with a trade-off: the Welcome Suica has a validity period of 28 days from its first use. After this period, any remaining balance becomes unusable, and the card itself cannot be refunded. This makes it ideal for typical tourist durations (1-3 weeks). For Indian and Bangladeshi travelers on a fixed itinerary, this is perfectly suitable. You load it with the amount you anticipate spending, use it for your transport and small purchases, and at the end of your trip, the card simply expires. This simplifies your departure process, as you won't need to queue at a JR East counter for a refund.
Where and How to Purchase Welcome Suica
Welcome Suica cards can be purchased at major JR East stations in the Tokyo metropolitan area, primarily at designated "JR EAST Travel Service Centers" or "Welcome Suica" vending machines. These are typically found at major airport stations like Narita Airport (Terminals 1 & 2/3) and Haneda Airport (Terminal 3 International Terminal), as well as prominent city stations like Tokyo, Shinjuku, and Ikebukuro.
Purchase Steps:
- Locate a JR EAST Travel Service Center or Welcome Suica vending machine. These machines are often red and clearly marked.
- Select "Welcome Suica" from the touch screen menu. The interface usually supports English.
- Choose your desired initial charge amount. You can typically load amounts like ¥1,000 (
₹560), ¥2,000 (₹1,120), ¥3,000 (₹1,680), etc., up to ¥20,000 (₹11,200). - Insert cash. Welcome Suica machines primarily accept Japanese Yen cash. They do not typically accept credit cards for initial purchase or top-ups.
- Receive your Welcome Suica card. The card will be dispensed immediately.
Remember to keep the "reference paper" that comes with your Welcome Suica. This paper indicates the card's validity period and is essential if you need to inquire about the card or its balance. While the Welcome Suica offers immense convenience for short stays, its non-refundable balance and expiry mean you should try to use up most of the loaded value before you leave.
Getting Your Physical IC Card: Where, How, and What to Expect
If Mobile Suica proves challenging or you simply prefer a tangible card, acquiring a physical Suica or Pasmo is straightforward. These standard IC cards require a ¥500 (~₹280) refundable deposit, which you get back when you return the card at the end of your trip. They do not have an expiry date, making them suitable for longer stays or for those planning multiple trips to Japan.
Where to Purchase
- Suica: Can be purchased at JR East ticket vending machines with an IC card option, or at "Midori-no-Madoguchi" (JR Ticket Offices) at any major JR East station in the Kanto region (Tokyo and surrounding areas).
- Pasmo: Available at ticket vending machines or ticket counters of non-JR private railways and subway lines within the Kanto region.
Both types of cards are readily available at major transport hubs like Narita Airport, Haneda Airport, Tokyo Station, Shinjuku Station, and Ueno Station. Look for machines with English language options, which are increasingly common.
Purchase Process
- Locate a suitable ticket vending machine. Look for machines that display the Suica or Pasmo logo and offer an "IC Card" or "New Card" option.
- Select the "Purchase New IC Card" option.
- Choose "Suica" or "Pasmo" (depending on the machine).
- Select your initial charge amount. The minimum initial purchase is typically ¥1,000 (~₹560), which includes the ¥500 deposit and ¥500 usable balance. You can load more if you wish, in increments of ¥1,000.
- Insert cash. These machines almost exclusively accept Japanese Yen cash. Credit cards are generally not accepted for initial purchase.
- Collect your card and receipt. The card will be dispensed, along with a receipt detailing your purchase.
Children's IC Cards
For children aged 6 to 11, special "Child" IC cards are available. These cards offer discounted fares (typically half the adult fare) on most transport networks. To purchase a child's IC card, you must go to a manned ticket counter (e.g., JR Ticket Office for Suica, or a private railway/subway counter for Pasmo) and present a passport or other proof of age for the child. The process cannot be done at vending machines. This is an important consideration for families from India and Bangladesh traveling with young ones, as it can significantly reduce transport costs.
Remember, the ¥500 deposit is standard for both adult and child physical IC cards. Keep your card safe, as losing it means losing the remaining balance and the deposit.
Topping Up Your IC Card: A Practical Guide for Foreign Visitors
Running out of balance on your IC card in the middle of a journey is a common travel hiccup. Fortunately, topping up (or "charging" as it's often called in Japan) your Suica, Pasmo, or Welcome Suica is simple and ubiquitous. For Indian and Bangladeshi travelers, understanding the payment options, particularly regarding foreign credit cards, is key.
At Station Ticket Vending Machines
This is the most common method. Most ticket vending machines at train and subway stations, especially those offering IC card services, have a "Charge" or "Top-up" option.
Steps:
- Insert your IC card into the designated slot on the machine.
- Select "Charge" from the touch screen menu (English option usually available).
- Choose the amount you wish to add (e.g., ¥1,000, ¥2,000, ¥5,000). Always aim for an amount that covers your immediate travel plans, perhaps ¥2,000-¥3,000 (~₹1,120-₹1,680) to start.
- Insert cash. Crucially, most station vending machines for IC card top-ups only accept Japanese Yen cash. Foreign credit cards are generally not accepted here.
- Collect your card. The balance will be instantly updated.
At Convenience Stores
This is often the most convenient method for foreign visitors, as convenience stores are everywhere and many staff members have some English proficiency. Popular chains like 7-Eleven, FamilyMart, and Lawson all offer IC card top-up services.
Steps:
- Go to the cashier with your IC card.
- Inform the staff you want to "charge" or "top up" your IC card. You can simply say "IC card charge, please" or show your card and point to the "charge" option on your phone if using Mobile Suica.
- State the amount you wish to add.
- Pay in cash. Again, cash is the most reliable payment method here. While some convenience stores might accept foreign credit cards for regular purchases, topping up IC cards usually requires cash.
- Tap your card or phone on the card reader when prompted by the cashier.
- Confirm the updated balance.
Foreign Credit Card Challenges
As mentioned in the Mobile Suica section, directly topping up IC cards (both physical and mobile) with foreign credit cards can be hit-or-miss. Many Japanese payment systems for transit are configured to primarily accept domestic cards.
- Physical Cards: Almost never accept foreign credit cards for top-ups at machines or convenience stores. Cash is king.
- Mobile Suica/Pasmo: While you can link a foreign credit card, direct top-ups often fail. Some users have reported success with specific Visa or Mastercard cards, particularly those with strong 3D Secure authentication. However, relying on this can lead to frustration.
Pro Tip for Indian/Bangladeshi Travelers: Always carry sufficient Japanese Yen cash, especially in smaller denominations (¥1,000, ¥5,000 notes), for topping up your IC card. This is the most foolproof method and avoids any payment gateway issues. Estimate your daily transport costs (Tokyo Metro rides typically range from ¥170-¥320, approx ₹95-₹180, depending on distance) and add a buffer for convenience store purchases. For a week-long trip, starting with ¥5,000 (₹2,800) and topping up ¥2,000-¥3,000 (₹1,120-₹1,680) every few days is a reasonable approach.
Using Your IC Card Beyond Transport: Shopping, Vending, and More
The utility of your Suica, Pasmo, or Welcome Suica extends far beyond just getting around. These cards are accepted as a form of electronic money at an incredibly wide array of retail outlets and services throughout Japan, adding a layer of convenience that Indian and Bangladeshi travelers will appreciate. This versatility can be particularly helpful when navigating food options.
Convenience Stores (Konbini)
This is where your IC card truly shines outside of transport. 7-Eleven, FamilyMart, Lawson, and other convenience stores are ubiquitous in Japan, offering everything from snacks, drinks, and meals to toiletries and ATM services. Your IC card is almost universally accepted for payment at these stores. This is particularly relevant for travelers with vegetarian or halal dietary concerns. While convenience stores aren't a primary source for specific halal meals, they often stock a variety of vegetarian-friendly items like rice balls (onigiri, check ingredients), fresh fruit, salads, and sometimes even vegetarian sandwiches or instant noodles. Paying with your IC card makes these quick purchases seamless and hassle-free, especially when language might be a barrier at a cashier.
Vending Machines
Japan is famous for its vending machines, offering everything from hot and cold drinks to instant noodles and even fresh produce. Many of these machines, especially in urban areas and at train stations, accept IC card payments. Simply tap your card on the reader, select your item, and it's dispensed. This is incredibly convenient for a quick refreshment on the go, without needing to carry exact change.
Coin Lockers
At train stations and other public areas, coin lockers are invaluable for storing luggage while you explore. Many modern lockers now accept IC card payments, eliminating the need to search for coins. You simply tap your card to pay for the locker, and then tap it again to unlock when you return. Costs vary by locker size and duration, typically ranging from ¥300 to ¥800 (~₹170-₹450) for a day.
Restaurants and Shops
While not as universally accepted as credit cards in larger establishments, many smaller restaurants, cafes, and shops, particularly those in and around train stations, accept IC card payments. Look for the IC card logos (Suica, Pasmo, Icoca, etc.) displayed near the cash register. For quick meals or coffee breaks, using your IC card is often faster than swiping a credit card or handling cash. Again, for those seeking specific food options, once you find a suitable eatery, the IC card simplifies the payment process.
Other Uses
You might also find IC card acceptance at some museums, tourist attractions, and even some taxis, particularly in major cities. Always look for the various IC card logos (which are often displayed together due to interoperability). The key takeaway is to always have some balance on your card, as its utility extends far beyond just getting from point A to B. It’s your compact, digital wallet for daily life in Japan.
Refunds and Departure: What Happens to Your Remaining Balance and Deposit
As your unforgettable Japan journey draws to a close, you’ll need to consider what to do with your IC card. The process differs significantly between a standard physical Suica/Pasmo card and a Welcome Suica. Mobile Suica refunds also have their own specific procedures.
Physical Suica and Pasmo Refunds
If you purchased a standard physical Suica or Pasmo card with the ¥500 (~₹280) deposit, you are entitled to a refund of your remaining balance and the deposit.
- Suica Refund: Can only be processed at JR East Travel Service Centers or manned ticket counters at JR East stations in the Tokyo metropolitan area. You cannot refund a Suica card outside the JR East service area (e.g., in Osaka or Kyoto).
- Pasmo Refund: Can only be processed at ticket counters of non-JR private railway or subway lines in the Kanto region (e.g., Tokyo Metro, Toei Subway, Keio Line, Odakyu Line). You cannot refund a Pasmo card at JR stations.
Refund Process:
- Go to the appropriate ticket counter (JR East for Suica, non-JR for Pasmo) at a major station before your departure.
- Present your IC card to the staff.
- The staff will process the refund. Be aware that a refund fee of ¥220 (~₹123) is typically deducted from your remaining balance. If your remaining balance is less than ¥220, only the ¥500 deposit will be returned. If your balance is exactly zero, you will still receive the ¥500 deposit.
- Receive your cash refund.
Important Note for Indian/Bangladeshi Travelers: Factor in the ¥220 refund fee when deciding if it's worth refunding a small balance. If you have, for example, ¥300 left, you'll only receive ¥80 (¥300 - ¥220) plus the ¥500 deposit. It might be simpler to use up small balances on a final convenience store purchase or vending machine drink before heading to the airport, then just refund the ¥500 deposit.
Welcome Suica and Mobile Suica/Pasmo Refunds
- Welcome Suica: As mentioned, the Welcome Suica does not offer refunds for any remaining balance. It also does not require a deposit, so there's no deposit to reclaim. The card is valid for 28 days, and any unused balance after this period is forfeited. The best practice is to spend down your balance on transport or purchases towards the end of your trip.
- Mobile Suica/Pasmo: Refunding a Mobile Suica or Pasmo balance is typically done through the respective app. However, this process often requires a Japanese bank account for the refund to be processed. For international tourists, a direct cash refund to a foreign credit card or bank account is usually not possible. Therefore, similar to Welcome Suica, the most practical advice for Mobile Suica/Pasmo users is to use up your balance before you leave Japan. If you have a significant balance, you might be able to transfer it to a new physical card (if you're planning a future trip), but this is often complex and not guaranteed.
General Advice: Plan to deplete your IC card balance as much as possible before your final departure. This means using it for your last train ride to the airport, buying souvenirs at a station gift shop that accepts IC cards, or stocking up on snacks and drinks at a convenience store. This minimises any lost funds due to refund fees or non-refundable policies.
Common Mistakes to Avoid and Pro Tips for a Smooth Trip
Navigating a new country's transport system can have its quirks. Here are some common pitfalls for Indian and Bangladeshi tourists to avoid and some pro tips to make your IC card experience flawless.
- Underestimating Balance Needs: The most frequent mistake is not having enough balance. Always check your balance (at ticket gates, vending machines, or convenience stores) before starting a long journey or entering a station. A good rule of thumb is to have at least ¥1,000-¥2,000 (~₹560-₹1,120) when you start your day. Getting stuck at a ticket gate because of insufficient funds is embarrassing and wastes time.
- Forgetting to Tap Out: Unlike some metro systems where you only tap in, in Japan, you must tap your IC card both when entering and exiting a station. If you forget to tap out, the system cannot calculate the correct fare, and you may face a penalty or need to seek assistance from station staff to resolve the issue.
- Confusing Welcome Suica with Standard Suica/Pasmo: Remember the Welcome Suica has a 28-day validity and no refund for remaining balance. Don't expect to get money back for an unused balance after its expiry or at the airport.
- Relying Solely on Foreign Credit Cards for Mobile Top-ups: As discussed, foreign credit cards can be unreliable for topping up Mobile Suica/Pasmo. Always have cash as a backup for charging, especially for physical cards.
- Losing Your Card: A physical IC card is like cash. If you lose it, the balance and deposit are gone. Keep it secure, perhaps in a dedicated wallet slot or card holder. Unlike registered cards for locals, tourist cards typically cannot be reissued with the remaining balance.
- Not Utilizing Children's Cards: For families, make sure to purchase child IC cards for eligible children. The savings on transport costs can be substantial over a multi-day trip. Remember to buy them at a manned counter with proof of age.
- Leveraging IC Card for Small Purchases: Don't limit your IC card use to just transport. Use it for convenience store purchases, vending machines, and lockers. This reduces your need for small change and speeds up transactions. It's especially useful for those quick, anonymous purchases that might contain vegetarian or halal options.
- Checking Official Websites: For the most up-to-date information on purchase locations, operating hours of service centers, and specific refund policies, always check the official JR East (for Suica) or Pasmo (for Pasmo) websites. Details can occasionally change.
- Using Navigation Apps: While not directly IC card-related, using apps like Google Maps or Japan Transit Planner (Jorudan/Navitime) is crucial. They integrate IC card fares and will tell you the exact cost, helping you ensure you have enough balance.
By keeping these tips in mind, your experience with Japan's IC cards will be smooth, efficient, and stress-free, allowing you to focus on enjoying the beauty and culture of Japan.
Sample Day Itinerary with IC Card Usage
Let's imagine a typical day for an Indian or Bangladeshi tourist in Tokyo, showcasing how your IC card simplifies every step.
Morning: Exploring Asakusa and Sumida River
- 8:30 AM: Start your day at your hotel near Shinjuku. You walk to Shinjuku Station and tap your Suica/Pasmo card on the gate to enter the JR Chuo Line. Fare deducted:
¥200 (₹112). - 9:00 AM: Arrive at Kanda, transfer to the Tokyo Metro Ginza Line. Tap your card again at the transfer gate, but no additional fare is deducted immediately as it's part of the same journey.
- 9:20 AM: Arrive at Asakusa Station. Tap out, and the total fare for the multi-line journey (e.g., ¥250, ~₹140) is deducted from your card. You head out to Senso-ji Temple.
- 11:00 AM: After exploring Senso-ji, you're feeling a bit peckish. You spot a FamilyMart and grab an onigiri (rice ball – check ingredients carefully for vegetarian options) and a green tea. You pay swiftly with your IC card, tapping it at the cashier. Cost:
¥350 (₹196).
Afternoon: Shibuya Crossing and Harajuku Fashion
- 12:30 PM: From Asakusa, you decide to head to Shibuya. You take the Ginza Line back to Shibuya Station. Tap in at Asakusa, tap out at Shibuya. Fare:
¥240 (₹134). - 1:00 PM: You've worked up an appetite. After navigating the iconic Shibuya Crossing, you find a small ramen shop that accepts IC cards. While many ramen shops aren't vegetarian-friendly, you might find a vegetable-based broth option or a side dish. You pay with your IC card. Cost:
¥900 (₹504). - 2:30 PM: From Shibuya, it's a short walk or a one-stop train ride to Harajuku. You opt for the train, tapping in and out for a quick journey. Fare:
¥140 (₹78). - 4:00 PM: After browsing Takeshita Street, you need to store your shopping bags to explore Meiji Jingu Shrine more comfortably. You find a coin locker at Harajuku Station, tap your IC card to pay for a medium locker. Cost:
¥500 (₹280).
Evening: Shinjuku Nightlife
- 6:00 PM: Retrieve your bags from the locker using your IC card. You take the JR Yamanote Line from Harajuku back to Shinjuku. Tap in and out. Fare:
¥160 (₹90). - 7:00 PM: You meet friends for dinner in Shinjuku. While a full-service restaurant might prefer credit cards or cash, you stop by a convenience store to pick up some drinks and snacks for later. You pay with your IC card. Cost:
¥700 (₹392).