
Photography Rules and the Best Instagram Spots in Japan
Navigate Japan's photography rules and discover 15 incredible Instagram spots. Learn about Gion bans, drone laws, and ethical shooting for Indian/Bangladeshi travelers.
Jul 10, 2026·✍️ olablog·⏱ 19 min read
Navigate Japan's photography rules and discover 15 incredible Instagram spots. Learn about Gion bans, drone laws, and ethical shooting for Indian/Bangladeshi travelers.
Japan is a dream destination for photographers, offering an unparalleled blend of ancient traditions, futuristic cityscapes, and breathtaking natural beauty. From the iconic Shibuya Crossing to serene bamboo groves, every corner seems to beckon your camera. However, capturing these moments responsibly requires understanding Japan's unique etiquette and specific photography rules. A misstep, even an unintentional one, can lead to fines or cultural misunderstandings, potentially spoiling your trip. This guide will walk you through what you can and can't shoot, helping you plan a memorable and respectful photography journey, often for less than ¥500 (approx. ₹280) for many scenic spots.
Understanding Photography Etiquette in Japan: More Than Just Point and Shoot
Japan's approach to photography is deeply rooted in respect, privacy, and the sanctity of certain spaces. Unlike some countries where snapping pictures freely is the norm, here, mindfulness is key. For first-time visitors from India or Bangladesh, where public photography might be more casual, adapting to these nuances is crucial for a smooth and enjoyable experience.
The Gion Photography Bans: A Strict Warning
Perhaps one of the most well-known, and often misunderstood, photography restrictions is in Kyoto's Gion district. Specifically, the private alleys around Hanamikoji Street, such as Shirakawa and Pontocho, have strict bans on photography of geisha and maiko (apprentice geisha) without explicit permission. This isn't just a suggestion; it's enforced by local ordinances, primarily due to the harassment these women faced from tourists. Violators can face fines of up to ¥10,000 (approximately ₹5,600 or BDT 7,500).
What you can do: You are generally allowed to photograph the scenic streets and traditional architecture of Gion. However, if a geisha or maiko passes by, put your camera down. Appreciate their presence respectfully. If you wish to photograph them, consider booking a private cultural experience where photography is permitted and part of the arrangement. Remember, these are private citizens going about their work, not public performers.
Shrines and Temples: Sacred Spaces, Not Just Photo Ops
Japan's shrines (Jinja) and temples (Otera) are places of worship and spiritual significance. Treating them as mere backdrops for your Instagram feed can be disrespectful.
- Inside buildings: Photography is almost universally prohibited inside the main halls of shrines and temples, especially where deities or sacred objects are enshrined. Look for "No Photography" signs, often depicted as a camera with a cross through it. Even if no sign is present, err on the side of caution.
- During ceremonies: If a ceremony or prayer is taking place, absolutely refrain from photography. This is a moment of deep personal significance for worshippers.
- Flash photography: Avoid using flash indoors or at night, as it can be disruptive and is often prohibited.
- Tripods and selfie sticks: These are often restricted in crowded areas or inside temple grounds to avoid obstructing pathways or disturbing others. Always check for signs.
- Worshippers: Never photograph individuals engaged in prayer or religious rituals without their explicit consent.
- General grounds: Generally, taking photos of the exterior architecture, gardens, and general grounds is permitted, provided you are not causing a disturbance or blocking pathways.
Photographing People: A Matter of Privacy and Politeness
In Japan, privacy is highly valued. Taking photos of strangers, especially children, without their permission is considered rude and can lead to confrontation.
- Always ask first: If you wish to photograph someone, always approach them politely and ask "Shashin ii desu ka?" (May I take a photo?) or "Sumimasen, shashin o totte mo ii desu ka?" (Excuse me, may I take a photo?). A simple nod or "hai" (yes) indicates permission. Respect a "iie" (no).
- Geisha and Maiko: As mentioned, this is particularly sensitive. Do not chase, block, or photograph them without permission.
- Children: Be extremely cautious when photographing children. It's almost always best to avoid it unless you have explicit permission from their parents or guardians.
- Street photography: While tempting, be mindful. Focus on scenes, architecture, and general atmosphere rather than identifiable individuals. If someone is clearly the subject of your shot, seek permission.
- Shopkeepers and staff: If you want to photograph a shop interior or a person working, ask permission. Many small, traditional businesses might prefer not to be photographed.
Navigating Tripod Rules and Drone Laws: Equipment Etiquette
While professional gear can elevate your photography, understanding where and how to use it is crucial in Japan.
Tripod Rules: Stability with Responsibility
Tripods are fantastic for low-light shots, long exposures, and perfectly framed compositions. However, their use is heavily regulated in many popular tourist areas.
- Where they're often restricted:
- Crowded areas: Shibuya Crossing, busy train stations like Shinjuku, narrow streets in traditional districts like Gion or Arashiyama's bamboo grove, especially during peak hours. A tripod can block pedestrian flow and become a tripping hazard.
- Inside buildings: Temples, museums, art galleries, shops, and restaurants almost always prohibit tripods.
- Specific attractions: Many observation decks (e.g., Tokyo Skytree, Shibuya Sky) or castle grounds might restrict them, often citing safety or obstruction concerns.
- Where they're generally allowed:
- Open parks: Large public parks like Shinjuku Gyoen (though sometimes with specific restrictions during crowded events) or Ueno Park, provided you don't obstruct pathways.
- Less-crowded natural areas: Mountain trails, beaches, or less-frequented viewpoints.
- Designated photography spots: Some locations might have specific areas where tripods are permitted.
- Alternatives: If a tripod is prohibited, consider a monopod for stability, or a small, flexible mini-tripod (like a GorillaPod) that can be set on a railing or low surface without becoming an obstruction. Always be discreet and prioritize safety and others' convenience. A good rule of thumb: if it feels like it might inconvenience someone, it probably will.
Drone Laws in Japan: Keep Them Grounded
Japan has some of the strictest drone regulations in the world, making it extremely difficult for casual tourists to fly them legally. The general advice for Indian and Bangladeshi travelers planning a typical tourist trip is to leave your drone at home.
- No-fly zones:
- Urban areas: Drones are largely prohibited over densely populated areas, which covers most major cities like Tokyo, Kyoto, and Osaka.
- Airports and heliports: Within a 9 km (5.6 miles) radius of any airport or heliport.
- Government facilities: Over or near government buildings, embassies, nuclear facilities, and other critical infrastructure.
- Public events: Drones are prohibited over crowds at festivals, concerts, sporting events, etc.
- Above 150 meters: Flights above 150 meters (approx. 492 feet) require special permission.
- Permit requirements: Even in permissible areas, flying a drone typically requires a permit from the Ministry of Land, Infrastructure, Transport and Tourism (MLIT). This process is complex, requires Japanese proficiency, and is generally not feasible for short-term visitors.
- Other restrictions: Drones cannot be flown at night, beyond visual line of sight, or over private property without consent.
- Penalties: Violating drone laws can result in significant fines (up to ¥500,000, approximately ₹280,000 or BDT 375,000) or even imprisonment.
Given these stringent rules, the risk and complexity far outweigh any potential photographic reward for most tourists. Focus on ground-based photography and enjoy the incredible perspectives available legally.
The Best Instagram Spots: Where to Capture Japan's Magic (15 Photogenic Legal Spots)
Now that we've covered the rules, let's explore 15 fantastic and legally photogenic locations across Japan, perfect for your Instagram feed. We'll include timing, tips, and relevant costs.
Tokyo: Neon, Tradition, and Serene Greenery
Senso-ji Temple, Asakusa: Tokyo's oldest temple offers stunning traditional architecture.
- What to shoot: The majestic Kaminarimon Gate with its giant lantern, Nakamise-dori market street, the main hall, and the five-story pagoda.
- Best time: Early morning (before 8 AM) to avoid crowds and get clear shots of the gate and street. Evening (after 6 PM) for illuminated views.
- Photography tips: Focus on details of the architecture, the intricate carvings, and the sheer scale of the gates. During the day, try to frame shots to minimize people.
- Cost: Free entry to temple grounds.
- Food: Asakusa has numerous street food stalls on Nakamise-dori, but options for strict vegetarian/halal might be limited. Look for specific shops advertising "shojin ryori" (Buddhist vegetarian cuisine) or check apps like HappyCow.
- Nearest Station: Asakusa Station (Ginza, Asakusa, Tobu Skytree lines).
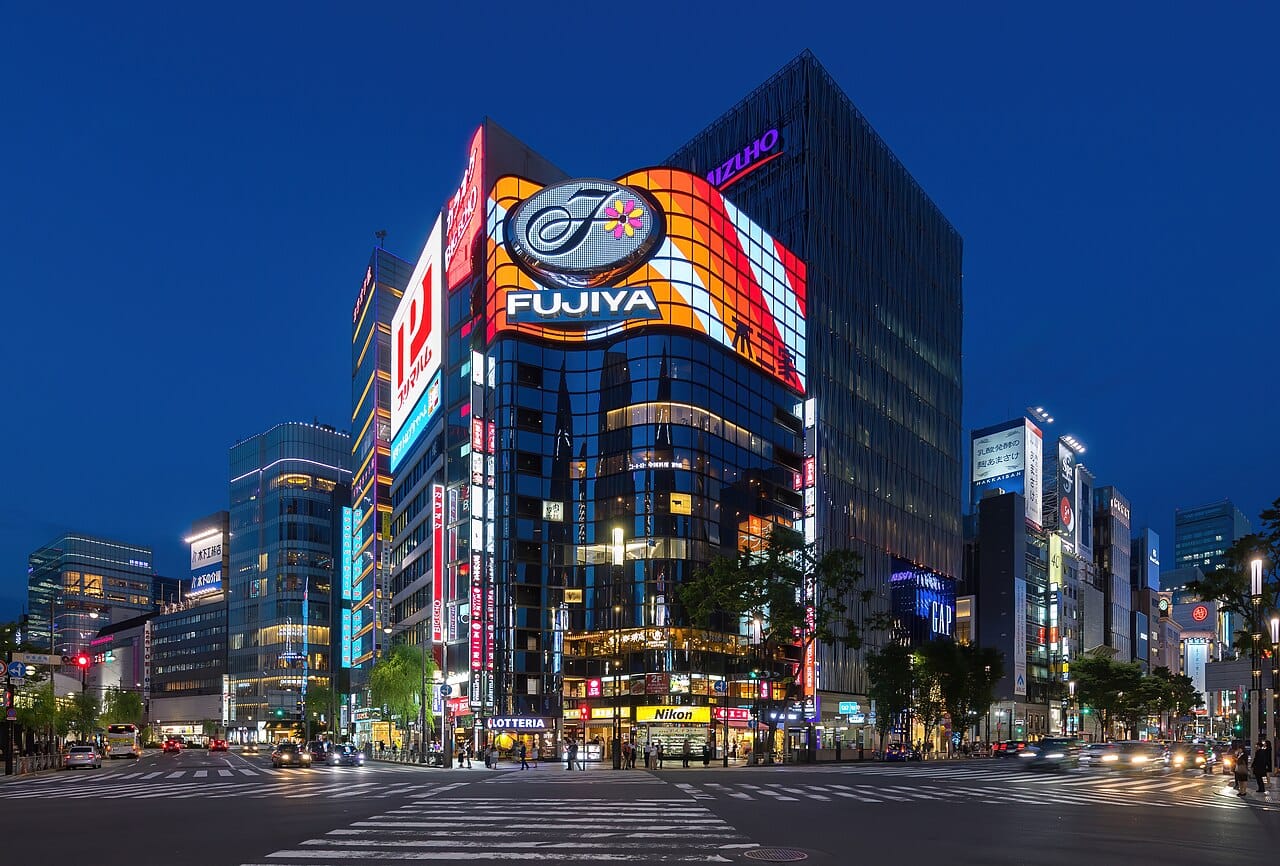
Shibuya Crossing: The world's busiest intersection, a quintessential Tokyo experience.
- What to shoot: The sheer volume of people crossing from multiple directions, the vibrant neon signs.
- Best time: Anytime after sunset for the full neon effect. Weekday evenings are busy but not overwhelmingly so. Avoid rush hour if you dislike extreme crowds.
- Photography tips: Get elevated! The best shots are from Shibuya Sky (see below), the second-floor window of Starbucks in TSUTAYA building (can be very crowded), or the pedestrian bridge connecting Shibuya Mark City to JR Shibuya Station.
- Cost: Free from street level.
- Food: Shibuya is a food paradise. Look for dedicated halal ramen spots or vegetarian-friendly cafes.
Shibuya Sky Observation Deck: For panoramic views of Shibuya Crossing and beyond.
- What to shoot: The iconic crossing from above, Tokyo Tower, Tokyo Skytree, and on clear days, even Mount Fuji.
- Best time: Sunset for breathtaking golden hour views transitioning to city lights. Book tickets well in advance for sunset slots.
- Photography tips: Use a wide-angle lens. Tripods are generally not allowed on the open-air deck, but small monopods or resting your camera on railings might be okay. Be mindful of reflections from the glass indoors.
- Cost: ¥2,000-¥2,200 (approx. ₹1,120-₹1,230) depending on advance purchase.
- Nearest Station: Shibuya Station.
Shinjuku Gyoen National Garden: A tranquil oasis amidst the urban sprawl.
- What to shoot: Japanese traditional garden, French formal garden, English landscape garden. Cherry blossoms in spring, autumn leaves in fall.
- Best time: Morning on a weekday for fewer crowds. Spring (late March/early April) for cherry blossoms, autumn (late November/early December) for koyo.
- Photography tips: Capture the contrast between the serene gardens and the Shinjuku skyscrapers in the background. Look for reflections in the ponds. Tripods are generally allowed in open areas but check for any specific restrictions.
- Cost: ¥500 (approx. ₹280) entry fee.
- Food: No food stalls inside, but plenty of options around Shinjuku Station.
- Nearest Station: Shinjuku-gyoemmae Station (Marunouchi Line), Shinjuku Station (various lines).
Meiji Jingu Shrine: A peaceful Shinto shrine dedicated to Emperor Meiji and Empress Shoken.
- What to shoot: The towering torii gates, the serene forest path, the main shrine buildings. Keep an eye out for traditional weddings (which are often fine to photograph from a distance, respectfully).
- Best time: Early morning (just after opening) for solitude and soft light.
- Photography tips: Focus on the grandeur of the torii gates and the natural beauty of the surrounding forest. Maintain respect; refrain from flash or loud shutter noises.
- Cost: Free entry to shrine grounds. The Inner Garden (Iris Garden) has a small fee during certain seasons, usually ¥500 (approx. ₹280).
- Food: Limited food options nearby, but Harajuku (just outside) offers diverse choices.
- Nearest Station: Harajuku Station (JR Yamanote Line), Meiji-jingumae Station (Chiyoda, Fukutoshin Lines).
Kyoto: Timeless Beauty and Cultural Icons
Fushimi Inari Taisha: The iconic shrine with thousands of vibrant vermilion torii gates.
- What to shoot: The endless tunnel of torii gates winding up the mountain.
- Best time: Very early morning (before 7 AM) or late afternoon/early evening (after 5 PM) to avoid crowds and get shots without many people. The light is also softer.
- Photography tips: Go beyond the first few hundred meters where most tourists stop. The further you walk, the fewer people there will be, allowing for clearer shots. Experiment with leading lines.
- Cost: Free entry.
- Food: Many street food stalls at the base, but verify ingredients for vegetarian/halal options.
- Nearest Station: Inari Station (JR Nara Line), Fushimi-Inari Station (Keihan Main Line).
Arashiyama Bamboo Grove: A serene, towering bamboo forest.
- What to shoot: The towering green stalks creating a natural tunnel.
- Best time: Very early morning (before 7 AM) is essential to capture the magic without throngs of people. Late afternoon can also work, but crowds persist.
- Photography tips: Focus on the vertical lines of the bamboo. Look up for interesting perspectives. Use a telephoto lens to compress the perspective and make the grove appear denser. Tripods are difficult here due to narrow paths and crowds.
- Cost: Free entry.
- Food: Restaurants and cafes in Arashiyama, including some traditional Japanese options.
- Nearest Station: Arashiyama Station (Keifuku Arashiyama Line), Saga-Arashiyama Station (JR Sagano Line).
Kiyomizu-dera Temple: A UNESCO World Heritage site with a famous wooden stage offering panoramic views.
- What to shoot: The main hall's wooden stage, especially during cherry blossom (spring) or autumn leaf (fall) seasons. The three-story pagoda, and views overlooking Kyoto city.
- Best time: Early morning (before 8 AM) to beat the crowds and enjoy the soft light. Sunset offers beautiful city views.
- Photography tips: Frame the wooden stage with the surrounding trees. Look for reflections in puddles after rain. Be mindful of others on the viewing platform.
- Cost: ¥400 (approx. ₹225) entry fee.
- Food: Many souvenir shops and traditional snack stalls on the approach, but check for dietary needs.
- Nearest Station: Gojo Station (Karasuma Line), then a 20-25 minute walk or bus ride.
Kinkaku-ji (Golden Pavilion): The stunning Zen temple covered in gold leaf.
- What to shoot: The golden pavilion reflecting in the pond, surrounded by meticulously maintained gardens.
- Best time: Morning (around opening time, 9 AM) for soft light and fewer reflections, or late afternoon for a golden glow. Sunny days are best to see the gold shimmer.
- Photography tips: The main viewing spot is across the pond. Look for compositions that include the pavilion, its reflection, and the garden elements.
- Cost: ¥500 (approx. ₹280) entry fee.
- Food: No food stalls within the temple grounds.
- Nearest Station: Kyoto Station, then take a bus (approx. 40 minutes).
Philosopher's Path (Tetsugaku no Michi): A scenic stone path along a canal, lined with cherry trees.
- What to shoot: The serene canal, cherry blossoms in spring, autumn leaves, charming houses and cafes.
- Best time: Spring for cherry blossoms (late March/early April) and autumn for vivid foliage (late November). Weekday mornings are best for fewer people.
- Photography tips: Look for reflections in the canal. Capture the quiet charm.
- Cost: Free.
- Food: Several small cafes and restaurants along the path.
- Nearest Station: Ginkakuji-michi bus stop, from Kyoto Station.
Beyond the Major Cities: Diverse Landscapes and Culture
Nara Park (Nara): Home to hundreds of free-roaming deer.
- What to shoot: The friendly (and sometimes mischievous) deer, the grand Todai-ji Temple, and the natural scenery.
- Best time: Morning to avoid the biggest crowds. Deer are active throughout the day.
- Photography tips: Get down to eye level with the deer. Be patient. Capture interactions between tourists and deer (feeding deer crackers, available for purchase). Be aware that deer can sometimes nudge or nip at clothing.
- Cost: Free entry to park. Todai-ji Temple entry: ¥600 (approx. ₹335).
- Food: Stalls selling deer crackers (senbei) are everywhere. Other food options are available near the park entrance.
- Nearest Station: Kintetsu Nara Station or JR Nara Station.
Itsukushima Shrine (Miyajima): The iconic "floating" torii gate.
- What to shoot: The magnificent torii gate appearing to float on the water at high tide, and grounded at low tide. The shrine complex itself, Mount Misen.
- Best time: High tide for the "floating" effect, low tide for walking up to the gate. Check tide schedules in advance. Sunset is magical as the gate is illuminated.
- Photography tips: Bring a telephoto lens for close-ups of the gate. Experiment with long exposures during sunset or night. Be respectful of the shrine's sacred nature.
- Cost: Ferry to Miyajima: ¥360 (approx. ₹200) one way. Shrine entry: ¥300 (approx. ₹170).
- Food: Many seafood restaurants; look for vegetarian options around the main shopping street.
- Nearest Station: Miyajimaguchi Station (JR Sanyo Line), then ferry.
Hakone (Lake Ashi & Mt. Fuji views): Stunning natural beauty with views of Japan's most famous peak.
- What to shoot: Mount Fuji reflecting in Lake Ashi, the red torii gate of Hakone Shrine on the lake, the pirate ships, scenic ropeway views.
- Best time: Clear, crisp mornings (often in autumn/winter) offer the best chance to see Fuji. Early morning is also less crowded on the ropeway and lake cruise.
- Photography tips: Position yourself on the Hakone Sightseeing Cruise or from the Hakone Ropeway for classic Fuji-over-lake shots. The "Old Tokaido Road" also offers charming forested paths.
- Cost: Hakone Free Pass (approx. ¥6,100 for 2 days, ~₹3,400) covers most transport.
- Food: Various restaurants in Hakone-Yumoto and near Lake Ashi.
- Nearest Station: Odawara Station (JR Tokaido Line), then transfer to Hakone Tozan Railway.
Shirakawa-go (Gifu): A UNESCO village famous for its unique gassho-zukuri (praying hands) farmhouses.
- What to shoot: The distinctive thatched-roof houses, especially against snow in winter or vibrant green in summer. The panoramic view from the Shiroyama Observation Deck.
- Best time: Winter (Jan-Feb) for snow-covered scenes, or spring/autumn for lush greenery/foliage. Early morning is best for fewer people.
- Photography tips: The observation deck offers the iconic village panorama. Wander through the village for close-ups of the houses and traditional life. Be respectful of residents' privacy.
- Cost: Bus fare to Shirakawa-go (e.g., from Takayama approx. ¥2,600 one way, ~₹1,450). Entry to some houses is ¥300-¥600 (approx. ₹170-₹335).
- Food: Several small restaurants serving local cuisine.
- Nearest Station: Accessible by bus from Takayama or Kanazawa.
Osaka Castle: A magnificent historical landmark in the heart of Osaka.
- What to shoot: The impressive main keep, moats, stone walls, and surrounding park, especially during cherry blossom season.
- Best time: Morning on a weekday. Spring for cherry blossoms (late March/early April).
- Photography tips: Capture the castle from different angles around the moat. The interior museum has some photography restrictions, but the exterior is generally fine.
- Cost: Castle entry: ¥600 (approx. ₹335). Park is free.
- Food: Food stalls and cafes in the park.
- Nearest Station: Tanimachiyonchome Station (Tanimachi, Chuo Lines), Morinomiya Station (JR Loop, Chuo, Nagahori Tsurumi-ryokuchi Lines).
Beyond the Frame: Ethical Travel and Respectful Photography
As travel editors, we believe that responsible tourism enhances everyone's experience. When you're behind the lens in Japan, remember these points:
- Be an ambassador: Your actions reflect on all tourists. By being respectful, you foster positive interactions and preserve Japan's welcoming spirit.
- Leave no trace: Take nothing but photographs, leave nothing but footprints. This includes not moving objects for a "better" shot or disturbing natural settings.
- Support local: If you're photographing a local business or a traditional craft, consider purchasing something to show your appreciation.
- Silence is golden: In quiet spaces like temples, traditional gardens, or on public transport, keep your voice down and your camera clicks discreet.
- Cultural sensitivity: Understand that what might be acceptable in India or Bangladesh might not be in Japan. Embrace the differences with an open mind. For example, the concept of "personal space" is often more pronounced.
Planning Your Photography Itinerary: A Sample Kyoto Day
Let's imagine a photography-focused day in Kyoto, keeping our audience in mind.
Morning (Sunrise to 10:00 AM): Fushimi Inari Taisha & Kiyomizu-dera
- 5:30 AM: Wake up early! Grab a quick, pre-packed vegetarian/halal breakfast.
- 6:00 AM: Head to Fushimi Inari Taisha. Take the JR Nara Line from Kyoto Station to Inari Station (approx. 5 minutes, covered by JR Pass if you have one, or ~¥150 / ₹84).
- 6:15 AM - 8:00 AM: Explore Fushimi Inari. This early, you'll have the torii gates mostly to yourself. Focus on leading lines, light filtering through the gates, and details.
- 8:00 AM - 8:30 AM: Take the Keihan Main Line from Fushimi-Inari Station to Kiyomizu-Gojo Station (approx. 10 minutes, ~¥220 / ₹123). From there, it's a pleasant uphill walk to Kiyomizu-dera.
- 8:45 AM - 10:00 AM: Arrive at Kiyomizu-dera (entry ¥400 / ₹225). Capture the iconic wooden stage and the panoramic views of Kyoto. The morning light is perfect.
Late Morning (10:00 AM - 1:00 PM): Gion & Philosopher's Path
- 10:00 AM - 10:30 AM: Walk down from Kiyomizu-dera through Sannenzaka and Ninenzaka streets. These charming traditional streets are great for photos (respecting privacy).
- 10:30 AM - 11:30 AM: Explore Gion's main streets. Remember the strict photography bans in private alleys. Focus on the traditional architecture and atmosphere. If you spot a geisha/maiko, put your camera down.
- 11:30 AM - 12:00 PM: Take a bus from Gion to Ginkakuji-michi stop (approx. 20 minutes, ~¥230 / ₹129).
- 12:00 PM - 1:00 PM: Stroll along a section of the Philosopher's Path. The tranquil canal is perfect for serene shots.
Lunch (1:00 PM - 2:00 PM): Vegetarian/Halal Options
- 1:00 PM - 2:00 PM: Near Ginkakuji, look for small cafes or restaurants. Many areas popular with tourists in Kyoto, especially around Gion and the main stations, will have restaurants advertising vegetarian-friendly or "Muslim-friendly" options. Always confirm ingredients politely using a translation app if needed. Expect a good vegetarian lunch to cost around ¥1,000-¥2,000 (approx. ₹560-₹1,120).
Afternoon (2:00 PM - 5:00 PM): Arashiyama Bamboo Grove & Tenryu-ji Temple
- 2:00 PM - 2:45 PM: From Ginkakuji-michi, take a bus or combination of bus/train to Arashiyama. This might involve a transfer or two, similar to navigating the Delhi Metro. (Approx. 45-60 minutes, ~¥300-¥500 / ₹170-₹280).
- 2:45 PM - 4:00 PM: While Arashiyama Bamboo Grove is best very early, late afternoon can still offer atmospheric shots, especially if you focus on details and look upwards. Nearby Tenryu-ji Temple (entry ¥500 / ₹280) offers beautiful Zen gardens.
- 4:00 PM - 5:00 PM: Explore the Togetsukyo Bridge and the Hozugawa River area for more scenic shots.
Evening (5:00 PM onwards): Kinkaku-ji or Dinner
- 5:00 PM - 5:45 PM: Head back towards Kyoto Station or Kinkaku-ji. (Approx. 30-45 minutes by bus, ~¥230 / ₹129).
- 5:45 PM - 6:30 PM: If time permits and the light is good, visit Kinkaku-ji (entry ¥500 / ₹280) for its golden glow. It closes around 5 PM, so check timings if you want to visit on a separate day.